Plants / Nerve plant
Fittonia in a terrarium: choose, plant, and care
A low-growing foliage plant for a managed humid display. Choose the actual plant and its growing space together, then keep the roots moist without leaving them waterlogged.
By Terrarium GuideSources & editorial method
Botanical identity: Fittonia albivenis
The short answer
A compact Fittonia albivenis can work in a humid terrarium with indirect light, a moist but aerated root zone, and access for pruning or removal. NC State specifically recommends dwarf plants for terrariums; a small nursery pot alone does not establish that a plant will stay dwarf.
Choose a lid you can open for inspection. A humid enclosure can reduce drying, but it does not make waterlogged substrate safe or establish a permanently sealed, maintenance-free system. An open humid display needs closer moisture checks; a dry succulent setup is a poor match.
Which display fits your care routine?
The comparisons below apply the documented moisture and growth needs to each display. They are conditional planning advice, not measured enclosure results.
| Your display | Fittonia decision | What you need to do |
|---|---|---|
| Humid terrarium with a removable lid | A compact plant is a candidate when its roots remain moist and aerated. | Keep a route to inspect the substrate and trim or remove spreading shoots. Adjust excess moisture rather than relying on the lid alone. |
| Open or partly open humid planting | Possible if you can prevent the root zone and surrounding air from drying excessively. | Check actual moisture and leaf condition. Avoid heating vents, cold drafts, and direct sun. |
| Open dry succulent display | Choose a different plant or a separate display. | Fittonia needs a different moisture regime. Do not increase water across a dry planting merely to accommodate it. |
| Tiny bottle with inaccessible planting space | Choose a wider opening or keep Fittonia in a removable pot. | Test access before planting. A small starter can still spread beyond its allotted footprint. |
Scope and important limits
A useful fit when
- Compact Fittonia albivenis in an accessible indoor humid display.
- Choosing a plant, planting it, and maintaining its space over time.
Use another path when
- A guaranteed miniature cultivar inferred from a retail label.
- Permanent airtight sealing or a dry succulent watering regime.
The terrarium decisions here are editorial applications of horticultural guidance. They are not Terrarium Guide growing trials.
Recognize the plant—and plan for spread
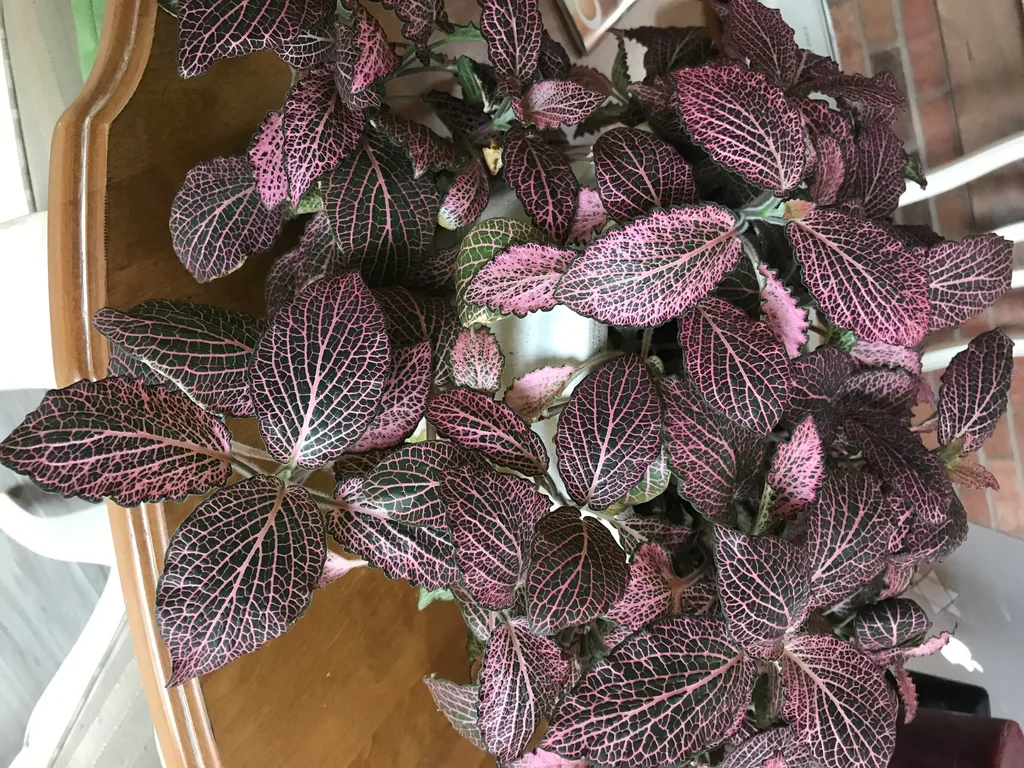
This profile covers Fittonia albivenis, commonly sold as nerve plant or mosaic plant. Fittonia verschaffeltii and Fittonia argyroneura appear among its older names. Contrasting pink, red, or white veins are useful visual clues; leaf color alone does not establish a named cultivar.
NC State reports a species height of 3–8 inches (about 8–20 cm) and width of 6–18 inches (about 15–46 cm). These are published horticultural dimensions, not a predicted size inside your bottle or a limit for every dwarf form. Plan for sideways growth as well as height.
- Measure the usable planting surface after placing hardscape.
- Leave room above the substrate for the canopy, and beside it for inspection.
- Before buying a plant marked mini, ask for its identity and expected growth; compare the actual rootball with the opening.
Check three spaces before you plant
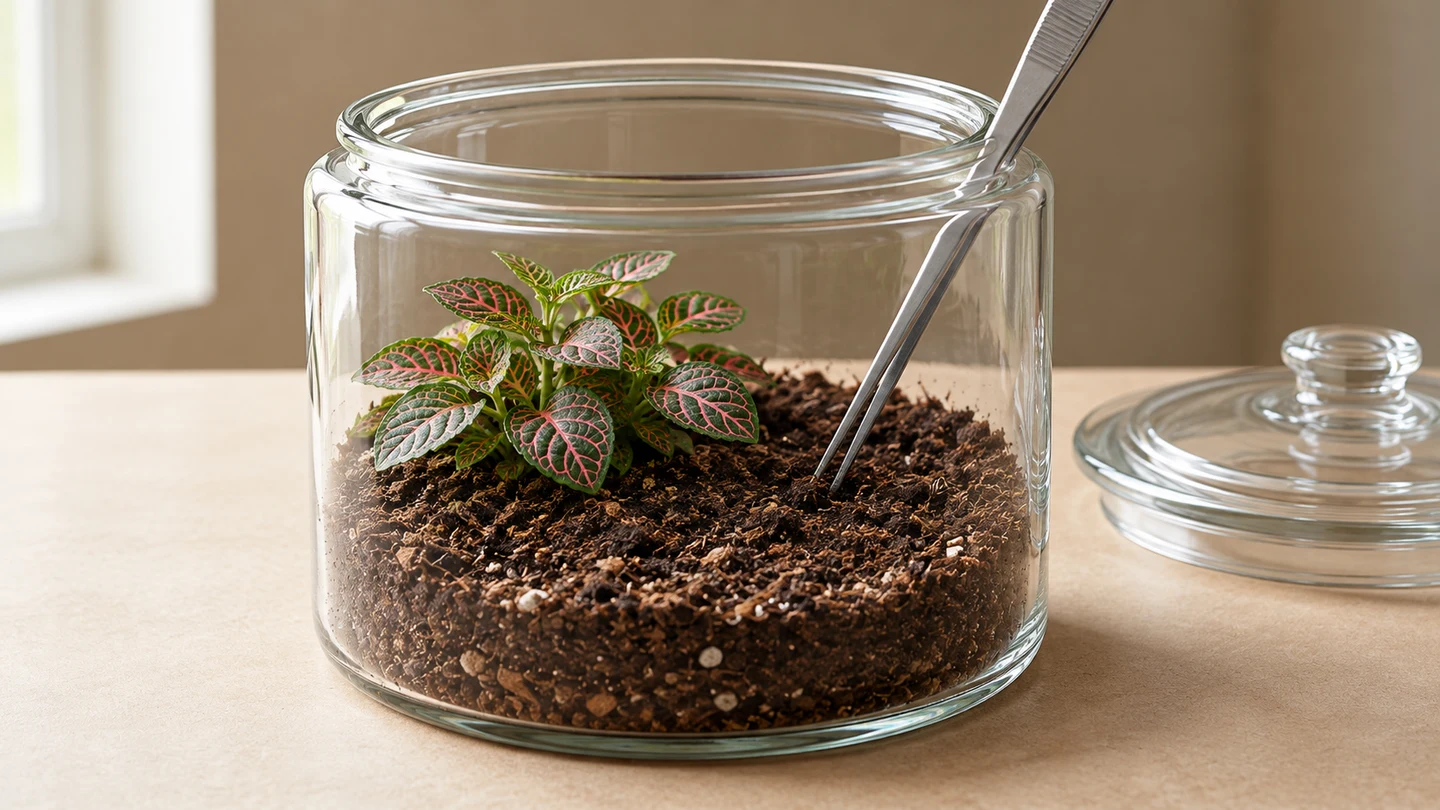
Look above the leaves, beside the plant, and through the opening. Leave growing room and a route for your tools, then apply the three checks to your container.
Apply the three checks to your jar
- Headroom above the growing layerMeasure from the planned soil surface to the lid position. Allow for the current canopy and future growth, rather than measuring from the bottom of the jar.
- Growing footprintAllow for the rootball and spreading shoots, with an exposed edge for inspection. Bottle volume alone does not tell you how much planting surface is usable.
- Maintenance routeTest the opening with the plant and your tools before planting. Leave a route to trim shoots, remove debris, or take the plant out.
Buy a plant you can inspect and manage
Small potted plants are available through houseplant retailers and garden centers. Evaluate the specimen and delivery conditions before choosing a seller.
- Check the botanical labelAsk whether a cultivar is known. Do not pay for a claimed dwarf habit on leaf color alone.
- Check the plant and rootball against your openingLeave enough access for planting and later removal; an attractive canopy is not the only dimension that matters.
- Inspect leaves, stems, and rootsChoose a strong plant without withering, leaf damage, or visible pests. Look for a developed root system when inspection is possible.
- Protect it from cold during transportConfirm how an online order will be protected in cold weather, or keep a locally bought plant warm on the journey home.
Evidence[8]
Plant into a moist, accessible root zone
These steps apply Fittonia’s documented rooted-substrate needs to a terrarium. They cover placing the plant; they do not assume that gravel makes a container without an outlet drain.
Choose the position first
Use indirect light and protect the display from drafts and drying heat. Test the opening with the rootball and your planting tool before committing to the layout.
Prepare moisture-retentive, aerated substrate
Use suitable houseplant potting medium that holds moisture without remaining waterlogged. Moisten it gradually; do not start with a saturated planting bed or bury the plant in standing water.
Place the rootball without burying the stems
Make a hole that fits the rootball. Ease the plant out of its pot, support it through the opening, and place it at its existing soil level. Backfill gently so roots contact the medium. Keep foliage clear of the soil where possible.
Leave an inspection edge
Keep a reachable patch of substrate beside the plant and a route for trimming. Remove loose plant debris. Add water only if the rootball or surrounding medium needs it, rather than automatically watering an already moist bed.
Observe before settling on a lid position
Check leaf condition and the root zone after planting. If the bed is excessively wet, stop adding water and open the enclosure while you assess it. If an open display dries too rapidly, reconsider the position or enclosure instead of repeatedly flooding the roots.
- Build the complete single-plant humid display Use the full materials and assembly sequence alongside this plant’s root and space checks.
Care by observation, not a watering calendar
Light and warmth
Use bright indirect light. Protect the leaves from direct sun and the plant from cold drafts. The RHS profile recommends temperatures above 17°C (63°F), while its growing guide also gives 15°C (60°F) as a minimum summary. Use the more conservative above-17°C guidance for planning; neither number is a tested terrarium survival limit.
Moist roots and humid air are separate checks
Feel an accessible edge of the rootball and surrounding medium. If it is becoming dry, add water gradually near the roots, then reassess. If it is already wet, do not water because leaves have drooped. A covered display generally dries more slowly than an open pot, so a houseplant watering frequency does not transfer directly.
Humidity guidance differs in wording: NC State describes medium humidity and dry-air damage, while RHS emphasizes humid air. Both distinguish useful moisture from harmful waterlogging. This does not support a universal humidity percentage or lid-opening interval.
Keep a manageable footprint
Pinching stems encourages fuller growth. In a terrarium, choose shoots that are crowding another plant or closing your inspection route, shorten them with clean tools, and remove the clippings. Inspect the new outline before cutting more.
If repeated pruning cannot preserve access or neighboring plants’ space, move Fittonia to a roomier display or a pot. Stem cuttings are a documented propagation method; treat them as a separate growing project rather than assuming every clipping will establish in the existing bed.
Check the cause before adding water
| What you notice | Check next | First action |
|---|---|---|
| Drooping leaves | Feel the rootball; check for dry air, heat, or drafts. | Water a drying root zone gradually. If already wet, withhold extra water and inspect the plant and substrate. |
| Yellowing leaves | Check both moisture and light. NC State flags overwatering; RHS also flags inadequate light. | Correct the condition you can establish. Change one factor at a time rather than treating yellowing as proof of one cause. |
| Brown or scorched foliage | Check direct sun, drying heat, and air conditions. | Move away from direct sun or drying heat, then reassess the root zone. Do not compensate for scorch by flooding it. |
| Affected or decaying plant material | Inspect the affected area and neighboring foliage. | Remove affected debris. If deterioration continues or roots appear damaged, remove the plant for inspection rather than sealing the problem inside. |
- Continue the wilt or yellow-leaf check Use the broader checks when this plant’s first corrective action does not explain the decline.
Choose companions by shared management
For a shared bed, check the other plant’s root moisture, light, space, and maintenance requirements individually. A humid-air label alone is insufficient. Fittonia’s spreading stems can occupy a neighbor’s growing space even when their environmental needs overlap.
Start with fewer plants and leave an inspection route between their footprints. If a companion requires a dry root zone, separate the displays. A different Fittonia leaf color changes the visual effect, but does not by itself solve a moisture or access conflict.
Two companion choices for Fittonia
Plan summary · read the complete conditions
Fittonia and Pilea in a partly open humid display
Fittonia and Pilea can share indirect light and moist, drained soil in a partly open humid display. Use them together only when their actual footprints, gentle airflow, and reachable pruning or removal routes fit the layout.
Layout: A partly open humid display with shared soil, measured around the two actual plants.
- Fittonia albivenis — Low leaf texture and ground cover
- Pilea cadierei
Plan summary · read the complete conditions
Fittonia and baby’s tears on a compact shared bed
Choose one groundcover when Fittonia and Soleirolia must spread across the same narrow surface without room to keep their growth separate or reach each plant for trimming. Their moisture needs can overlap, but this cramped layout cannot manage the competition. A larger, independently reachable layout needs its own check.
Layout: A narrow, single-level shared surface without separately reachable growing space for both expanding groundcovers.
- Fittonia albivenis — Spreading ground cover
- Soleirolia soleirolii
What this advice is based on
Your next step
Compare conditions and companions
More detail when you need it
- Compare sellers and arrival formsKeep Fittonia’s dwarf-form and rootball checks here; use the buying guide for channels and shipping.
- Compare open humid plants and companionsCheck separate planting zones and the complete humid planting plans.
- Compare closed-display plant choicesCheck conditional candidates, air movement conflicts, and access for care.
- How we use sourcesUnderstand the difference between horticultural facts, editorial terrarium advice, and growing observations.
Explore more in plants
Sources and review
- Terrariums — MU Extension Guide G6520 · University of Missouri Extension
- Pilea cadierei — NC State Plant Toolbox · NC State Extension
- Soleirolia soleirolii — NC State Plant Toolbox · NC State Extension
- Pilea cadierei — RHS Plant Profile · Royal Horticultural Society
- Pilea cadierei Aluminum Plant — UF/IFAS Extension · University of Florida IFAS Extension
- Fittonia albivenis — NC State Plant Toolbox · NC State Extension
- Fittonia — RHS Plant Guide · Royal Horticultural Society
- How to grow Fittonia — RHS Growing Guide · Royal Horticultural Society
- Indoor Plant Care — Purdue Extension HO-39 (general indoor ventilation context) · Purdue University Extension
- WFO Plant List 2026-06 (taxonomic identity) · World Flora Online