Materials / Base, divider, and charcoal
Terrarium drainage layers: what stones, mesh, and charcoal can do
Decide which lower layers serve your planting, keep enough room for roots, and plan where unwanted water can go.
By Terrarium GuideSources & editorial method
The short answer
In a humid terrarium with a layered bed, a coarse base provides space where added water may collect, and a permeable divider limits fine medium falling into it. Neither creates an outlet through solid glass or guarantees that the roots above stay aerated.
Choose the root arrangement before buying layers. A removable draining pot can be watered outside the display; an air-plant support has no soil bed to separate. Charcoal is an optional method choice, not a substitute for suitable medium, controlled watering, and access to remove excess water.
Choose a water route before a stack of layers
| Arrangement | Base and divider decision | Water route to preserve |
|---|---|---|
| Humid bed planted directly in solid glass | A traditional coarse base and permeable divider are one published method; reserve adequate root depth. | Water remains inside. Keep an inspection area and a reachable route to remove unwanted collected water. |
| Humid bed without a separate coarse base | Penn State describes planting into suitable damp root medium without a bottom rock layer. A divider has no layer boundary to separate. | Solid glass still has no outlet. Reserve root depth, inspect moisture and keep excess water reachable. |
| Removable draining pot inside glass | The root pot does not need a decorative gravel layer beneath its mix. A separate collection layer in the outer vessel is not required. | Lift the pot out to water, let it drain, and empty the saucer or outer vessel before returning it. |
| Open display for drying succulents | A stone layer cannot replace a draining root container. | Use a genuine outlet or a removable draining pot, with its own drying routine. |
| Open support for epiphytic air plants | No soil bed means no soil-divider stack is needed. | Keep the plant and support removable for the appropriate watering, draining, and drying routine. |
- Check the vessel and its actual outlet An open top and a draining inner pot have different jobs.
- Follow the build for your plants Keep the humid, succulent, air-plant, and flytrap methods separate.
Scope and important limits
A useful fit when
- Choosing a lower layer and separator for a plant-only humid display.
- Deciding whether charcoal belongs in your chosen method and checking alternatives.
Use another path when
- Animal enclosures, aquarium filtration, engineered false-bottom construction, or a universal watering schedule.
Material choices apply published horticultural guidance. Activated-carbon treatment evidence explains a mechanism, not measured performance or a growing trial in a terrarium.
Why a coarse layer does not guarantee dry roots
A hole allows water to leave a root container. Spaces among stones inside an unperforated jar do not. Water collected there still belongs to the same display and can eventually reach the growing layer.
Illinois Extension explains that fine potting medium over coarse gravel can retain water above the boundary before water enters the gravel. This is often called perched water. Adding rocks under potting mix is therefore not a reliable way to improve drainage in an individual pot.
Traditional terrarium instructions, including Iowa State’s, still use a lower coarse layer as collection space. These describe an arrangement, not proof that the medium above stays unsaturated. We apply the container-water mechanism here as a caution: inspect the actual root medium as well as the visible base, and never water extra merely because the stones look empty.
- Understand water and air in the growing medium Keep root-medium structure separate from the base-layer decision.
Keep collected water visible and reachable
Leave a clear inspection area at the lower glass and a safe way to reach unwanted collected water. Neither a traditional coarse base nor a bed without that base can send water through a solid vessel.
Before filling the vessel, check that you can open it, reach the medium and remove excess without shifting the planting or hardscape. If the design hides or traps unwanted water, change the access or choose a removable root container.
- Check before adding more water Choose a watering method for the actual root arrangement.
Choose a base for its job, not its color
| Choice | Useful role | Limit or check |
|---|---|---|
| Washed gravel or small pebbles | A coarse lower space in a traditional layered humid bed. | Uses growing depth and adds weight. It does not remove water from the vessel. |
| Perlite as a lower layer | An alternative included in Iowa State’s terrarium method. | Lower placement differs from mixing an amendment around roots; do not infer identical behavior from pale color. |
| No separate base inside a removable root pot | Keeps the growing mix in the root container and the water outlet accessible. | Choose a suitable mix, check the real drainage hole, and discard runoff. |
| A raised platform or engineered false bottom | A different structure from simply pouring in stones. | Do not improvise a load-bearing floor from this guide. Support, access, and water removal need a design for the actual enclosure. |
- Reserve depth for the actual roots A decorative band should not displace the growing zone.
Choose a divider that holds medium and passes water
| Material | What it contributes | What to check |
|---|---|---|
| Fine permeable screen or synthetic fabric | A physical barrier between fine medium and coarse base. | Use clean material with known intended use. Test the actual weave; a gap at the wall bypasses the barrier. |
| Long-fiber sphagnum | A published alternative for retaining medium above the coarse layer. | A moisture-holding organic material, not a waterproof membrane or the same thing as fine sphagnum peat. |
| Solid plastic sheet or other waterproof liner | Blocks passage instead of providing a permeable separation. | Do not substitute it for the porous divider in this method; water still needs a route through. |
| Preserved decorative moss or an unidentified scrap | No verified divider function from its appearance alone. | Check treatment and material identity; choose a known permeable separator instead of assuming every moss product works. |
- Distinguish living moss, fibers, and preserved products A divider material is a different purchase from a living surface planting.
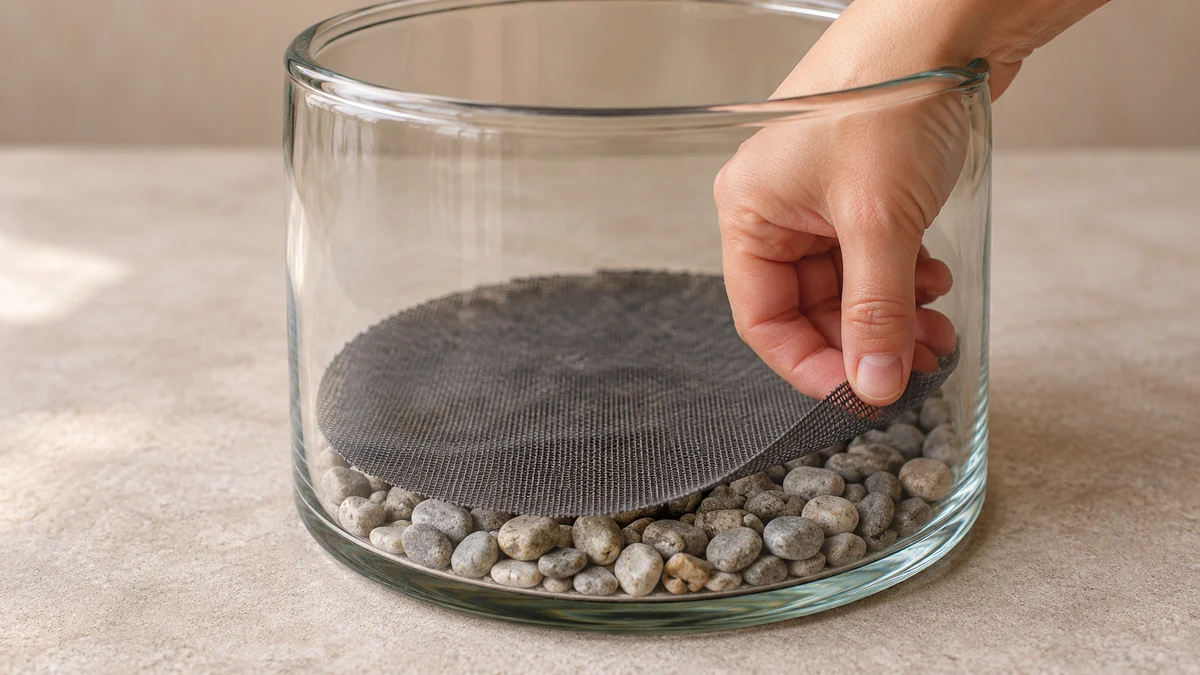
Trial-fit the divider before adding growing medium
The lifted edge shows the mesh and the coarse stones beneath it. This is a fitting stage: settle and check the edge before covering it.
Evidence[8]
Check the separator before committing the planting
These are practical fit checks for a layered humid bed. Use the full planting guide for cleaning, root placement, and initial watering.
Leave room for roots first
Compare the actual rootballs, planned base, growing-medium depth, and space under the lid. Choose less decorative fill or another vessel if the roots would be squeezed into a shallow layer.
Evidence[5]
- Measure the usable planting space Include growth, access, and future removal.
Try the material outside the vessel
As a practical check, support a small sample, place a little of the intended medium on it, and add a small amount of water. It should pass water while holding back most particles. If water pools on it or medium readily falls through, choose another separator.
Fit it over the base and inspect the edges
Use a piece that covers the interface, settling it against the inner wall without a broad uncovered edge or bulky folds. Check around the perimeter before adding the growing medium. This is a particle barrier, not a sealed reservoir lid.
Evidence[8]
Add medium without displacing the divider
Place suitable medium gently over it and check the sides for obvious migration. Preserve a reachable inspection area. A separator is not a permanent root barrier, so keep future plant removal possible.
Evidence[3]
- Continue with the full planting sequence Plant at the existing growing level and assess water needs.
Charcoal: when to include it and what it cannot promise
You do not need to dismantle a suitable planting just because you omitted charcoal. Published methods differ: UF/IFAS includes horticultural charcoal for its closed method and skips it in the open version, while the RHS planting method does not call for a separate charcoal layer. Choose one coherent method rather than automatically combining every suggested ingredient.
Horticultural charcoal, activated carbon, and biochar are different purchases
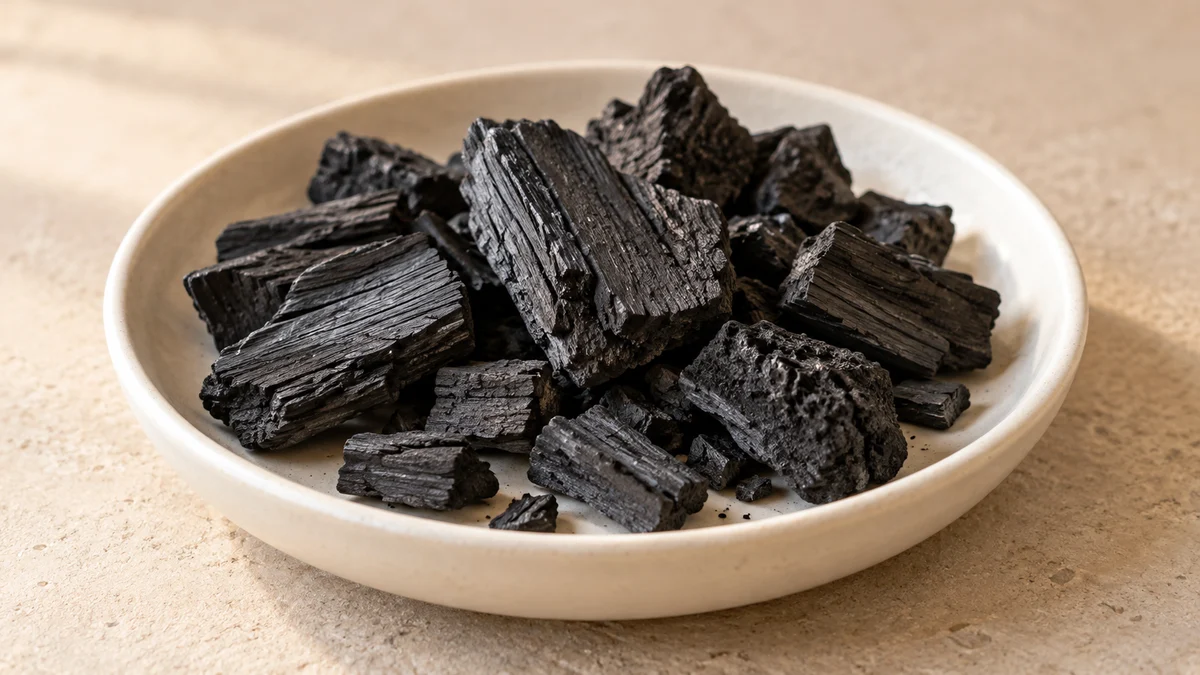
A horticultural-charcoal label identifies a gardening product; check the actual ingredients and whether activation is specified rather than assuming the word “charcoal” proves filter performance. If a chosen planting method includes it, use a traceable product intended for that use and follow that method and its product directions.
Biochar is a soil amendment with properties that vary by feedstock and processing. Some products are enriched or change pH; not all are alkaline. Do not exchange it scoop-for-scoop for a specified charcoal or use an unknown product in a specialist low-nutrient or acidic medium.
Leave barbecue briquettes, fire residues, and stove ash out of the planting. RHS warns that barbecue products and stove residues can contain unsuitable additives or contaminants. A black color does not establish horticultural suitability.
Activated carbon has an adsorption mechanism, not a guarantee
Activated carbon is processed to develop a large internal surface area. Adsorption means some compounds attach to that surface. EPA describes its use for particular organic compounds and odors in engineered drinking-water treatment, with capacity depending on the carbon and the substances present.
That evidence does not establish how much a static layer will treat in a planted jar. It supplies no universal terrarium dose, lifetime, mold prevention, or sterilization claim. Exhausted treatment carbon needs replacement or regeneration in those systems; rinsing a handful of terrarium charcoal does not establish restored adsorption capacity.
Evidence[10]
Waterlogging and decay need checks, not an extra black layer
Charcoal cannot make water leave solid glass. If the root medium is saturated, adding carbon does not restore the intended water route. If material is decaying, identify and remove the affected debris and check the planting conditions instead of treating odor reduction as proof of healthy roots.
There is no supported replacement calendar here for a buried terrarium layer. Keep the roots and medium accessible; reassess a failing planting on its observed condition rather than digging it up on an invented carbon-expiry date.
Check the base and roots before adding more water
- The stones look dry
- Check the growing medium as well.
- Check
- Inspect a reachable part of the root medium, not just the visible voids below it.
- Action
- Water according to the identified plants and actual medium condition. An empty-looking coarse layer is not a watering signal.
- Water is collected below the planting
- Pause and check whether it reaches the root zone.
- Check
- Look at the base, lower growing medium, and the accessible removal route.
- Action
- Remove reachable unwanted water without disturbing roots. Use the excess-moisture guide for removal, follow-up, and the point at which to lift out the planting.
- Stop or reassess
- Do not keep adding water, stones, or charcoal to compensate for inaccessible accumulation.
- Fine medium is falling into the base
- Reassess the divider fit.
- Check
- Look for a gap, displaced edge, or material whose openings do not retain the mix.
- Action
- Before planting, remove the trial fill and refit or change the separator. In an established planting, avoid pulling a buried screen through the roots; rework it when the planting can be lifted safely.
- Only the glass is foggy
- Separate condensation from root saturation.
- Check
- Inspect the root medium and any collected water too.
- Action
- For the humid garden, adjust excess moisture when needed. Compare glass droplets, root wetness and collected water using the separate checks in the condensation guide.
- Check the wider system before intervening Compare observations of glass, roots, growth, and decay.
Your next step
Plan the rest of the build
More detail when you need it
Explore more in materials
Sources and review
- Creating a Closed Terrarium — planting without a bottom rock layer · Penn State Extension
- How to Create and Care for a Terrarium — collection layer and care · Iowa State University Extension and Outreach
- Plants and Youth: Designing and Building a Terrarium — porous divider and scoped charcoal method · University of Florida IFAS Extension
- Container Drainage Options — gravel boundaries, outlets, and pot liners · University of Illinois Extension
- Terrariums and bottle gardens — planting method and moisture checks · Royal Horticultural Society
- Air plants — supports, watering, and drying · Royal Horticultural Society
- Aloe vera — root medium and drainage requirements · NC State Extension
- Terrariums for Fun till Spring — barrier choices and moisture checks · University of Florida IFAS Extension Duval County
- Terrariums — sphagnum separation, standing water, and debris removal · University of Missouri Extension
- Overview of Drinking Water Treatment Technologies — granular activated carbon · United States Environmental Protection Agency
- Biochar — variable properties, pH, enriched products, and unsuitable residues · Royal Horticultural Society