Care / Mold and recurrence
Mold in a terrarium: what to check, remove, and change
Find where the growth starts, check the surrounding plant tissue, and choose between local cleanup and removing a declining plant.
By Terrarium GuideSources & editorial method
The short answer
For a small mold patch on a fallen leaf or removable decoration, lift out the affected material and check nearby plants. Correct excessive wetness or crowded, persistently wet foliage. Do not add water to an already wet bed; retain the moisture the actual plants need while adjusting an openable humid cover.
Fuzzy growth on living leaves or flowers, expanding soft patches, or a collapsing stem needs closer plant inspection. Remove affected tissue or the plant when necessary. Mold and mould mean the same thing here; color alone cannot distinguish harmless surface growth from a plant disease.
Where is the growth, and what is changing?
Inspect the growth and the material beneath it. Take a clear photo before removal so you can compare the same place later.
- On a dead leaf, loose wood, or the medium surface
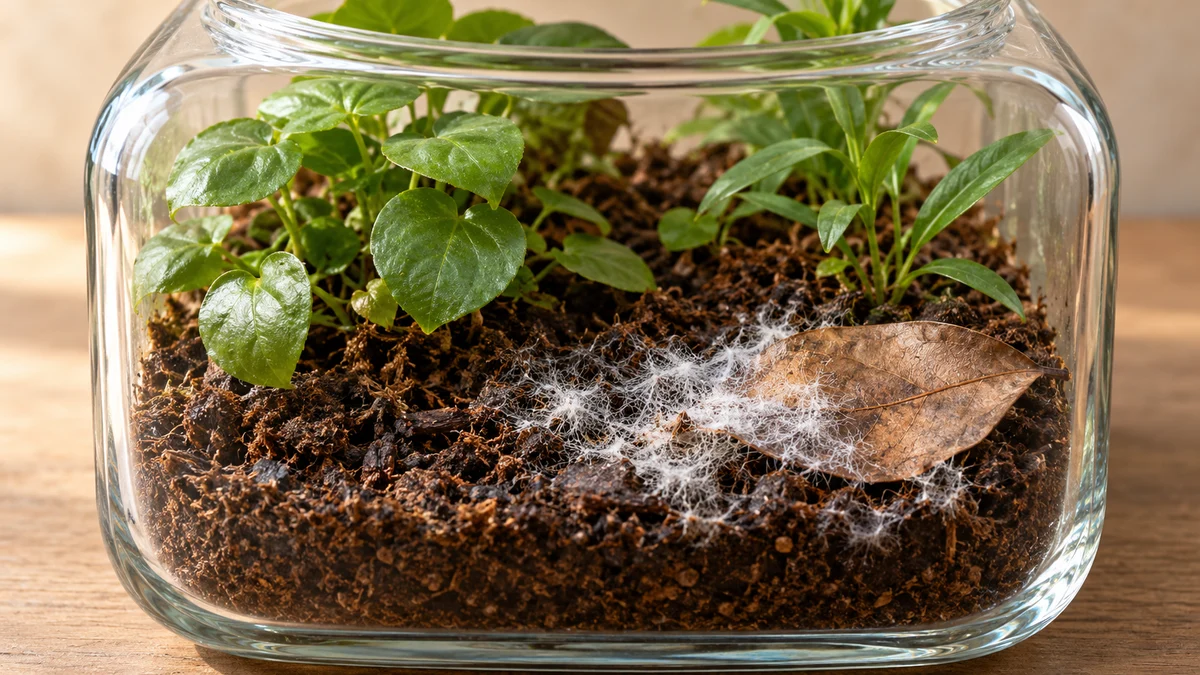
AI teaching illustration. Look at the white threads on the exposed soil and fallen leaf at the front. Check whether growth is confined to loose dead material, then inspect the nearby plant bases before cleaning. - Start with a local check and cleanup
- Check
- Is it confined to that material? Inspect neighboring stems and leaves for softening or expanding damage.
- Action
- Lift out affected debris or removable decoration. Check moisture and access; a surface patch alone does not justify stripping healthy roots.
- Stop or reassess
- Growth reaches living tissue, expands after cleanup, or the planting declines. Move to plant inspection.
- On living leaves, flowers, or a soft stem
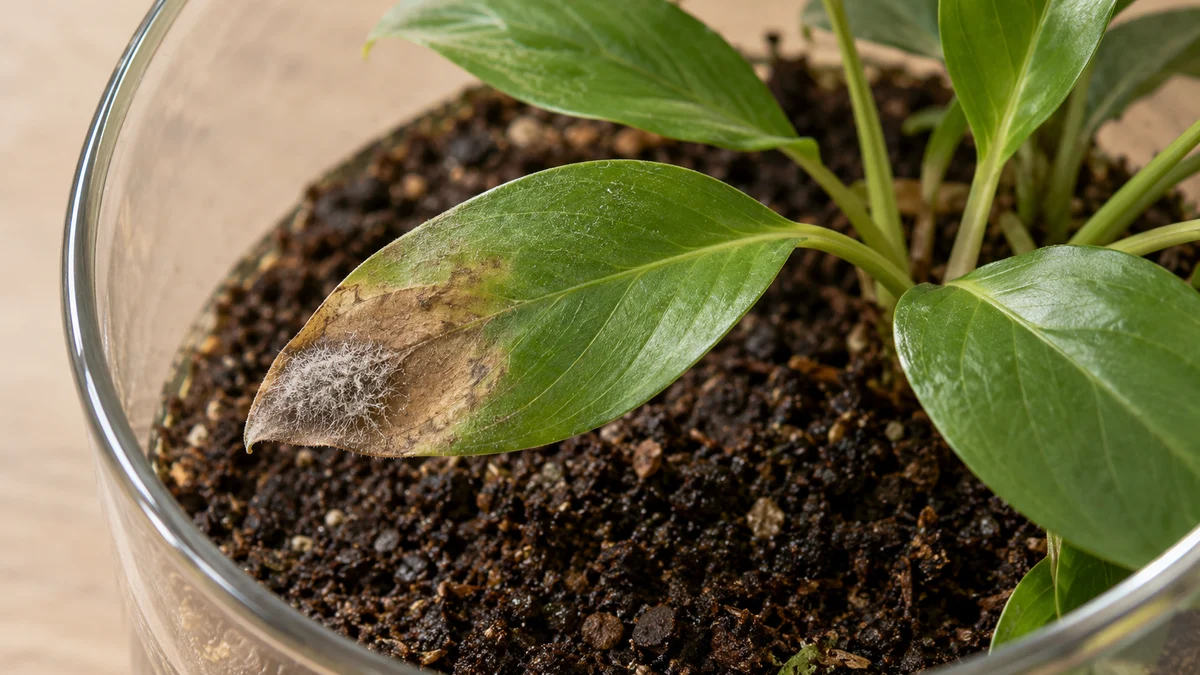
AI teaching illustration. Look at the fuzzy patch on the brown leaf tip. Check that leaf’s tissue and its neighbors; an attached-leaf problem needs more than scraping the soil. The image does not identify a pathogen. - Treat this as a plant problem
- Check
- Look for enlarging tan or brown areas and soft tissue with gray fuzz, especially on fading flowers and older leaves.
- Action
- Remove affected material with clean tools. Separate a removable affected plant for inspection and suitable care when practical.
- Stop or reassess
- Damage continues into the crown or stem, several plants decline, or safe removal is impossible. Get plant-specific help.
- At the base, with wilting and wet roots
- Inspect the rootball and crown
- Check
- Inspect for softened or discolored roots. A failing root system can accompany wet-medium wilt; surface fuzz does not identify a pathogen.
- Action
- Stop watering already wet roots. Inspect a removable pot outside the glass; free a planted rootball carefully if decline persists.
- Stop or reassess
- The crown is collapsing or most roots are soft. A cosmetic scrape cannot restore damaged tissue.
Evidence[5]
Scope and important limits
A useful fit when
- Checking visible growth in a humid terrarium or open plant display.
- Removing a reachable patch and deciding what a recurrence means.
Use another path when
- Identifying a fungus species from color or a photograph alone.
- A pesticide recipe, animal-enclosure treatment, or building-mold assessment.
This guide applies horticultural sources to the stated planting arrangements. It does not report a Terrarium Guide disease trial.
Check before calling every white patch mold
| What you see | What to check next | Useful first action |
|---|---|---|
| Fine threads or fuzz on dead organic material | Is it confined to that material, with neighboring plants firm and unchanged? | Remove loose affected debris and monitor. Iowa State’s harmless surface-mold example concerns peat pots and healthy seedlings, not every terrarium fungus. Evidence[2] |
| Gray-brown fuzz with soft, expanding leaf or flower damage | Inspect older leaves, spent blooms and adjoining tissue. | Gray mold is a concern. Remove damaged material and reduce persistent leaf wetness and crowding. |
| White powder spreading over living leaves | Look for small powdery spots merging into a coating on leaves or stems. | Consider powdery mildew. Remove affected leaves and improve spacing and air circulation; use plant-specific advice rather than soil cleanup alone. Evidence[6] |
| Cottony clumps in leaf joints or under leaves | Use a magnifier to look for insect bodies, wax and sticky residue. | Mealybugs can resemble fuzz. Identify the organism before choosing pest treatment. Evidence[7] |
| Hard pale crust or repeated water marks | Check texture, fertilizer and water history against threadlike growth. | Mineral residues can resemble pale growth. Do not flood solid-bottom glass to copy pot-leaching advice. |
| Dark soot-like coating with sticky leaves | Inspect stems and leaf undersides for sap-feeding pests. | Investigate honeydew and its pest source; cleaning the coating alone does not address that source. Evidence[9] |
Look at texture as well as location
A close view reveals branching threads. Also check the whole affected plant: location and expanding tissue damage determine the next action.
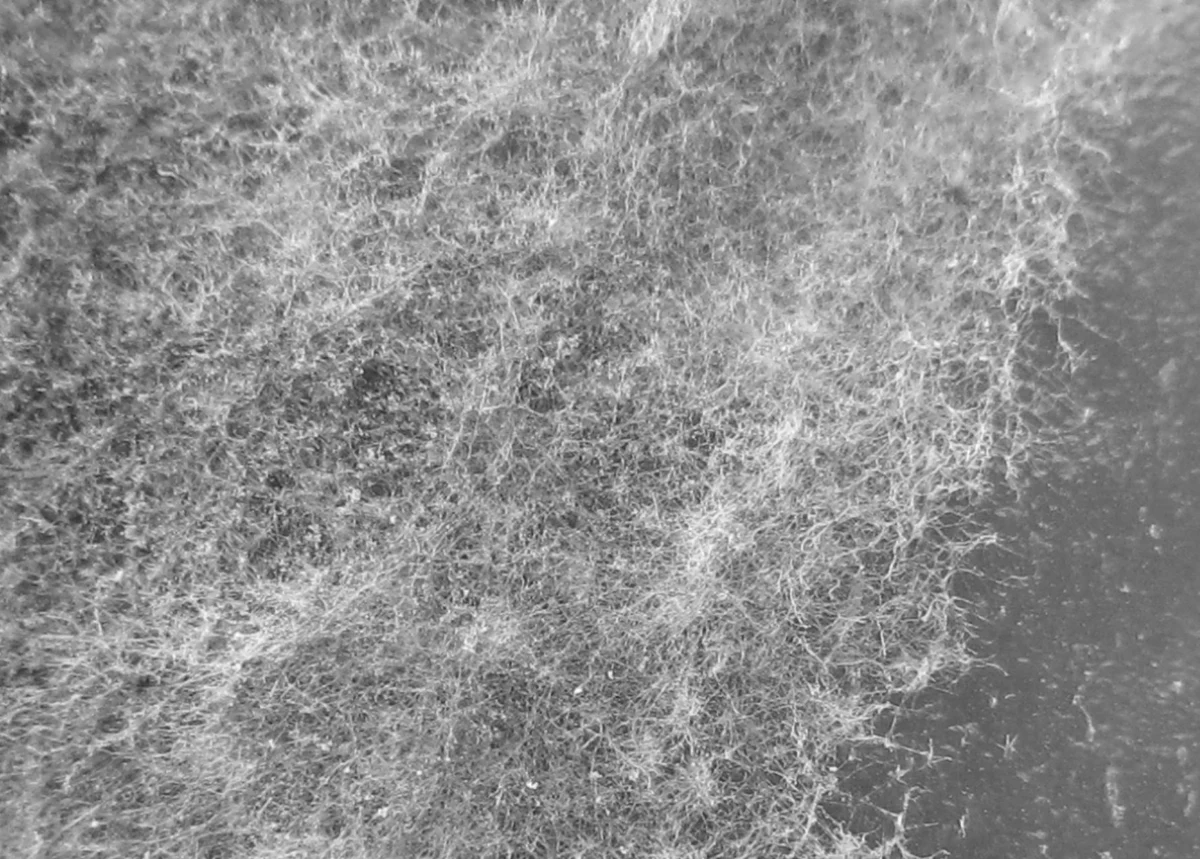
Evidence[15]
Remove a reachable patch without scattering debris
Use this for a localized problem. A collapsing living stem or crown calls for the removal and help criteria below.
Clean tools away from the planting
Remove residue, then disinfect cutting tools using an appropriate labeled method, including its contact time and material precautions. Clean between affected plants. Keep cleaning liquid out of the planted vessel.
Evidence[10]
Correct supporting conditions
Check root moisture and unwanted collected water. For excessive wetness, pause watering and adjust the humid cover while monitoring the plants. Restore space around crowded wet leaves without drying the bed below its plants’ needs.
- Check the actual root medium Use the watering threshold for these plants and this root arrangement.
Adjust humidity without sacrificing the plants
Wet leaves, high humidity and poor air movement favor gray mold. Space crowded foliage, remove fading flowers and aim necessary water at the medium. A humid plant’s roots can need moisture while its foliage should not remain wet.
Release excess moisture through an openable humid cover and reassess foliage and roots. There is no universal lid-off duration: opening, room conditions and plants differ. Clear glass does not show that the roots need more water.
For a drying succulent or removable air plant, restore its own drainage or water-and-dry routine outside the display. Do not keep it damp for cleanup organisms. Change an arrangement whose retained humidity conflicts with its plants.
- Correct excess moisture and reassess the cover Check glass, root medium and collected water separately; retain the plants’ required moisture.
- Restore suitable succulent root care Keep drainage and the required drying interval.
- Use the air-plant removal and drying sequence Follow the identified plant’s method before returning it to glass.
What to check after cleanup
Recheck the same site at the next inspection and sooner if damage spreads. Compare photos, tissue and moisture instead of waiting for an invented cure deadline.
- No new patch; plants stay firm
- Return to observation
- Check
- Inspect the cleaned site and nearby stems, not only the glass.
- Action
- Continue appropriate care and prompt debris removal. Leave sound roots in place.
- Stop or reassess
- A new patch, soft tissue or worsening leaf condition appears.
- The same dead material or decoration grows fuzz again
- Remove the recurring source
- Check
- Look for remaining organic debris and inaccessible areas.
- Action
- Leave a removable problem item out. Recheck crowding and moisture before adding another decoration.
- Stop or reassess
- Living tissue deteriorates too; reassess the plant instead of repeating decoration cleanup.
- Growth spreads or tissue keeps softening
- Escalate beyond surface cleaning
- Check
- Document the boundary and inspect the affected crown and roots.
- Action
- Remove a badly affected plant or isolate a removable pot. Get plant-specific advice if the cause is unclear.
- Stop or reassess
- Avoid cycling through sprays while deterioration advances.
Will springtails or charcoal fix it?
Springtails feed on fungi and decaying organic matter, but that role does not establish a cure for a diseased leaf, damaged crown or saturated root zone. Do the cleanup and plant check first; you need not buy a culture to begin.
Charcoal cannot remove water through solid glass. Published terrarium methods differ in its use; a layer is not a demonstrated mold treatment. Covering a patch with fresh charcoal, gravel or moss does not remove its source.
- Check springtail roles and culture limits Keep organism appearance and optional culture checks with the materials guide.
- Check charcoal types and evidence limits Separate material function from mold-prevention promises.
Skip improvised sprays and sterilizing a planted jar
When to remove a plant, rebuild, or ask for help
Remove a severely damaged plant when its crown or main stem is collapsing, or most accessible roots are soft and deteriorating. Inspect outside the display where practical. Root color varies; use texture and continuing decline alongside discoloration rather than calling every dark root rotten.
One surface patch does not require an automatic rebuild. Rework a bed when widespread decline, inaccessible decay or unmanageable saturation prevents local correction. Move viable plants into suitable separate care, remove affected material and clean the empty vessel before replanting. Do not sterilize the living arrangement in place.
For continuing or unexplained damage, ask a nursery, local horticultural advisory service or plant diagnostic clinic. Provide the plant’s name, whole-plant and close-up photos, starting location, root condition, water/cover history and actions taken. Ask how to submit a sample before sending one.
- Inspect a declining plant’s roots and crown Keep the supported handling and tissue checks with the complete decline guide.
- Remove and replace a plant carefully Preserve access without forcing the rootball through a narrow opening.
- Reassemble an accessible humid planting Use the complete sequence after correcting unsuitable conditions.
- Inspect replacement material Check identity and condition before planting.
Your next step
Correct the underlying conditions
Explore more in care
Sources and review
- Terrariums and bottle gardens · Royal Horticultural Society
- Will mold on peat pots harm my flower and vegetable seedlings? · Iowa State University Extension and Outreach
- Gray Mold or Botrytis Blight on Indoor Plants · University of Maryland Extension
- Grey mould · Royal Horticultural Society
- Diagnose Indoor Plant Problems · University of Maryland Extension
- Powdery Mildew on Indoor Plants · University of Maryland Extension
- Managing insects on indoor plants — mealybugs · University of Minnesota Extension
- How to help a poorly houseplant · Royal Horticultural Society
- Honeydew and Sooty Mold · University of Maryland Extension
- Clean and disinfect gardening tools and containers · University of Minnesota Extension
- How to Create and Care for a Terrarium · Iowa State University Extension and Outreach
- Springtails — feeding and moisture context · University of Maryland Extension
- Cacti and succulents · University of Minnesota Extension
- Air plants · Royal Horticultural Society
- Botrytis cinerea-NW-JS-1 — photograph, source identification and license · Schlaghecken Josef / Wikimedia Commons