Care / Routine maintenance
Terrarium care: check, clean, prune, and know when to change the planting
A practical routine for an established garden, with separate care for humid roots, drying succulents, and air plants.
By Terrarium GuideSources & editorial method
The short answer
Check the plants, rooted medium, light, and growing space before doing anything. In a covered humid terrarium, add water only when the root zone needs it, remove dead material, and trim or replace plants before they block their neighbors or the opening. Keep the lid removable for that work.
An open humid planting loses water differently from a covered one. Drying succulents need a draining root arrangement, while epiphytic air plants need an exposed support and a separate watering and drying route. Use the care method for the actual plants rather than a single misting schedule for every glass container.
Check these five things before reaching for water
Start outside the glass. Open it when a closer check or maintenance is needed; a healthy planting does not need an intervention at every inspection.
- Space for growth and your toolsCheck whether leaves are shading neighbors, pressing into the cover, or blocking the removal route. Plan a trim or a plant move before the garden becomes inaccessible.
Evidence[3]
Scope and important limits
A useful fit when
- Looking after an established plant terrarium or open plant display.
- Deciding whether to leave it alone, do light maintenance, or change an outgrown arrangement.
Use another path when
- Reptile, amphibian, or aquarium husbandry.
- Identifying a disease from one symptom or supplying every species’ pruning and seasonal instructions.
This routine combines horticultural sources with practical application to accessible glass gardens. It is not a Terrarium Guide growing trial. Keep each plant’s identity and specific requirements with the display.
Match the routine to the growing arrangement
| Arrangement | Routine to preserve | Avoid this shortcut |
|---|---|---|
| Covered humid foliage garden | Keep the rooted medium appropriately moist; inspect before adding water. Open for necessary cleanup and moisture adjustment. | Watering because a week has passed, or keeping an unhealthy planting sealed to preserve the seal. |
| Open or partly open humid planting | Check the same plant requirements, with attention to moisture loss through the opening. Recheck after changing the lid or position. | Treating every open vessel as a dry succulent garden, or closing it without reassessing conditions. |
| Open drying succulent display | Let the medium dry between waterings as the identified plant requires. Water a removable draining pot outside the glass, drain it, and empty runoff before returning it. | Repeated light misting of leaves, or leaving the pot standing in water trapped in the outer bowl. |
| Epiphytic air-plant display | Keep air movement and a usable removal route. Follow the identified plant’s watering method outside the glass, allow drying, then return it. | Adding water to a decorative soil bed, sealing the display, or returning a wet plant to cramped glass. |
| Independent pots or a named specialist tray | Check each pot separately. Keep water quality, intentional tray levels and seasons with the identified plant’s guidance. | Emptying a managed flytrap tray or forcing a moist-root plant to dry completely because a neighboring succulent does. |
- Follow the drying-root routine Keep the light, drainage, and plant-specific care together.
- Follow the air-plant removal and drying steps Use the complete sequence for supported epiphytes.
- Use separate care for carnivorous plants Check water quality, root medium, light, and seasonal needs before applying a general foliage routine.
Set inspection reminders, not automatic watering days
Iowa State suggests checking established closed terrariums every few weeks. Treat that as a reminder to inspect, not a promise that every display can be left for the same interval. Open gardens and plants with a drying or separate watering routine need checks that match their actual water use.
Check sooner after watering, moving the display, changing a cover or lamp, trimming heavily, or adding a plant. Those are useful triggers because the conditions or planting have changed. Once it is stable, use your own observations to decide how often to look again.
- At an ordinary check: inspect the five items above; leave suitable conditions alone.
- After an adjustment: note what changed and compare the same leaves and root area at the next check.
- Before time away: check the current moisture and care needs; arrange help if needed rather than giving an extra soaking.
Water, wait, or open the lid?
For a humid rooted garden, check the accessible root medium before adding water. If it is appropriately moist, wait; if it is becoming too dry for the plants, use a controlled addition. Wilting with wet roots calls for inspection rather than another refill.
If excess moisture persists in a covered humid planting, pause watering and open for adjustment. Rooted medium that stays saturated needs a closer look at the plant and water route. Use the full watering guide for moisture checks, application, amounts, and follow-up.
- Decide when and how to water Choose the method for a humid bed, draining pot, or exposed air plant.
- Correct excess moisture and condensation Distinguish glass droplets, unwanted pooling and wet-root decline.
Clear debris and restore growing room
Look for material you can lift out and growth that blocks access. The front surface and the space beneath the cover are useful places to start.
Work through a light maintenance session
Prepare access and clean tools
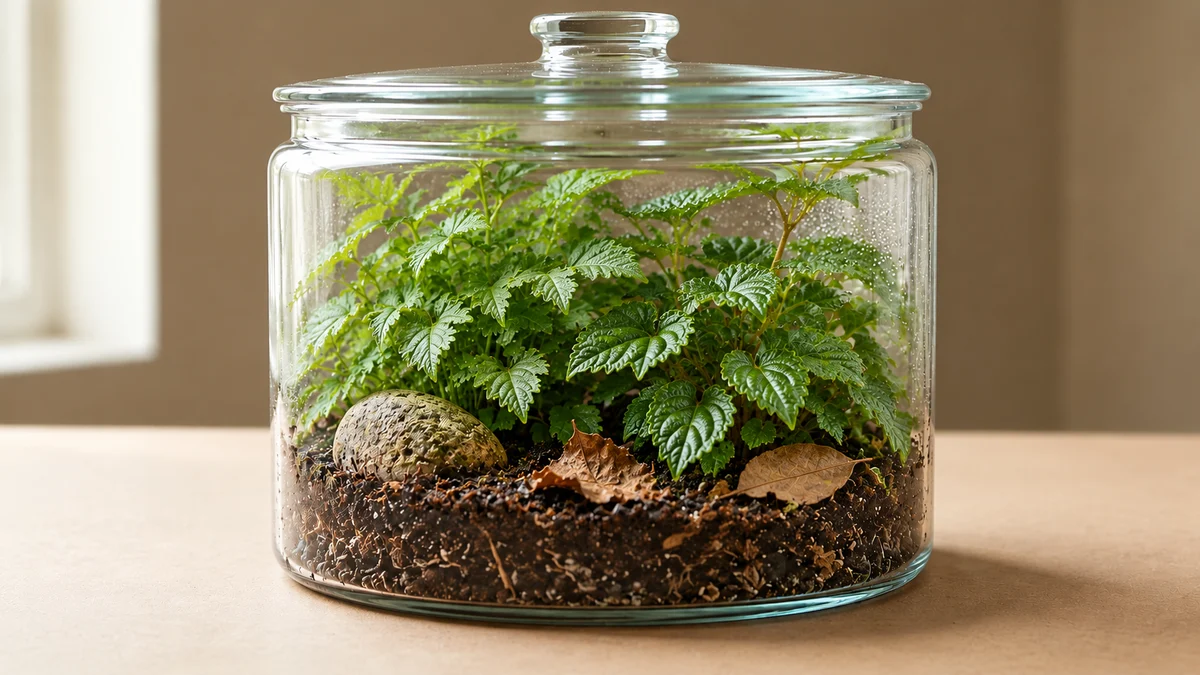
Put the lid safely aside and identify the material to remove. Clean soil and plant residue from scissors and tweezers. Disinfect cutting tools between plants using a suitable labeled method, away from the planting; do not pour a tool cleaner into the jar.
Evidence[9]
Trim according to the identified plant
For a branching stem plant that tolerates tip pruning, a cut just above a leaf node can shorten a leggy stem. Keep that method specific: a fern frond, rosette, or moss patch needs its own care instructions. Do not shear every growth form to the same height.
Evidence[8]
- Find the plant’s own maintenance instructions Use its identity before cutting live growth.
Retrieve clippings and check the result
Remove every reachable clipping. Check remaining growing tips, the route for tools and lid clearance. Replace the cover only if the humid planting’s moisture condition calls for it; pruning is not a reason to add water or fertilizer automatically.
Keep the view clear without adding a cleaning solution to the bed
Remove loose soil from accessible glass with a soft brush, or gently wipe the inside with a clean cloth where you can reach without crushing leaves. For routine condensation, wiping or briefly opening the cover can clear the view while you check moisture. Do not keep rinsing the wall merely for appearance when the roots are already wet.
If a vessel needs a thorough wash, move the plants and growing materials out first. Clean and rinse the empty vessel before reassembly. Container and tool disinfectants belong in that separate cleaning task, not in a living planted bed.
Replace an outgrown plant before it becomes trapped
A terrarium does not need a scheduled annual rebuild. Act when the planting or root arrangement no longer fits the care you can provide.
Decide whether trimming solves the actual problem
If modest plant-specific trimming restores light and access, keep the plant. If its normal growth continually fills the vessel or its care conflicts with the neighbors, move it to a suitable separate arrangement instead of cutting it smaller indefinitely.
Evidence[3]
Clear a route and lift the rootball carefully
Move removable decorations first. Loosen accessible medium around the rootball and support it as you lift, avoiding neighboring roots. If it cannot pass through the opening, take apart enough of the arrangement to release it; do not drag the foliage through a narrow neck.
Evidence[4]
- Recheck the usable opening and space Choose a vessel that supports future removal as well as planting.
Recheck the replacement rather than copying the old choice
Choose for the remaining light, root moisture, adult growth and maintenance route. Inspect incoming material separately before planting. Restore suitable medium around disturbed roots and judge moisture before watering.
- Check and observe the incoming plant Keep identity and health checks with the replacement purchase.
- Use the planting steps for reassembly Follow the method for this root arrangement.
Recheck light, season, and feeding as the garden changes
The same tabletop can receive different light
The sun’s angle, day length and heating use change through the year. Recheck the actual display rather than applying Northern Hemisphere month names everywhere. Keep a humid jar out of hot direct sun; adjust a changed position gradually for the plants.
With a lamp, check whether growing leaves now sit closer to it or shade their neighbors. Light coverage and heat are separate checks from the timer setting.
Do not make feeding a default closed-jar chore
Iowa State advises against routine terrarium fertilizing because it accelerates crowding, and some mixes already contain feed. Check light, moisture and the plant’s needs before treating weak growth or yellow leaves as a nutrient shortage.
Use species-specific feeding guidance for plants managed in separate pots or on supports. A routine for an ordinary humid foliage bed does not replace specialist nutrition or dormancy requirements.
- Adjust the growing position or lamp Check leaf-level coverage, heat, distance, and daily timing.
- Check the root medium and added feed Distinguish ingredients and root functions before changing the mix.
When routine maintenance needs a closer investigation
- Wilting or yellowing continues
- Inspect the plant and conditions
- Check
- Note which leaves changed and inspect root moisture, light, heat and recent changes. Wet roots can accompany wilting too.
- Action
- Correct a demonstrated mismatch. If decline continues, inspect the affected rootball rather than repeating water or feed. Keep photos and care notes for a nursery or local plant advisory service if the cause remains unclear.
- Stop or reassess
- You cannot distinguish the cause or damage keeps spreading; avoid stacking several unverified treatments.
- Unfamiliar insects, webbing, or sticky patches appear
- Identify before treating
- Check
- Look at leaf undersides and the affected parts with a magnifier; not every small organism has the same role.
- Action
- If plant-feeding pests are found, separate the affected plant where practical and check neighboring plants. Use identified, plant-appropriate advice before choosing a treatment.
- Stop or reassess
- The organism is unidentified or the plant cannot be treated safely in place. Do not improvise a soap or pesticide mixture inside the display.
Evidence[10]
- Visible decay or persistent wetness returns after cleanup
- Reassess the arrangement
- Check
- Look for remaining dead material, wet rooted medium and blocked access.
- Action
- Remove accessible decaying material, stop adding water to wet roots, and inspect affected plants. Use the mold guide to distinguish a surface patch from damage to living tissue and choose the next action.
- Stop or reassess
- Tissue keeps deteriorating or roots remain saturated. A fresh decorative surface or a resealed lid does not resolve those conditions.
Leave a useful care note for yourself or a helper
Keep a short record with the display. These are observations of your garden, not proof that the same interval or combination will work in another one.
- Plant names, root arrangement, and where to find each plant’s care instructions.
- Last inspection: leaf condition, root-zone moisture, fallen material, and growing space.
- Last action: what was watered, opened, moved, trimmed, or replaced, and when.
- Next check: the change you want to reassess and what would justify action.
Leave a care note someone else can use
Fill this in for your actual display before a handover or time away. Record the normal condition, the check that triggers watering, the correct root-care method, and whom to contact. Leave unknown values blank and resolve them with the responsible person; do not turn an inspection reminder into a fixed watering day.
Fill this in on the page, then copy or download it before leaving. If your browser does not start a download, use Copy edited text. Your edits stay in this open page only; they are not saved to an account or sent anywhere.
- Choose the next check when growth changes Keep an observation and a safe first action with the handover rather than guessing a diagnosis.
Your next step
Correct the underlying conditions
More detail when you need it
- Check visible mold and recurring growthDistinguish surface debris from damaged living tissue, remove affected material, and know when to inspect the plant.
- Understand the water cycle and its limitsKeep the system explanation separate from your maintenance routine.
- Choose for future growing spaceCompare actual footprint, spread, headroom, and removal access.
- Change a layout you cannot maintainCompare a shared bed with removable roots and exposed supports.
Explore more in care
Sources and review
- Growing Dionaea muscipula — managed water and seasonal care · International Carnivorous Plant Society
- Terrariums and bottle gardens · Royal Horticultural Society
- How to Create and Care for a Terrarium · Iowa State University Extension and Outreach
- Plants and Youth: Designing and Building a Terrarium · University of Florida IFAS Extension
- Watering Indoor Plants · University of Maryland Extension
- Cacti and succulents · University of Minnesota Extension
- Air plants · Royal Horticultural Society
- Spring houseplant care · University of Minnesota Extension
- Clean and disinfect gardening tools and containers · University of Minnesota Extension
- Managing insects on indoor plants · University of Minnesota Extension